- Bring Your Idea to Life -
Get Your Free Product Design Info Today!
Resource Articles
How Do You Make a Prototype of an Invention?
By MarketBlast
- Bring Your Idea to Life -
Get Your Free Product Design Info Today!
If you have a great invention idea, the next step
is bringing it to life through a prototype. A prototype is a tangible
representation of your concept that allows you to test functionality, fix
flaws, and show potential investors or partners how your invention works. But
how do you go from idea to prototype without feeling overwhelmed?
In this blog post, we’ll guide you through the
process of making a prototype of your invention—from brainstorming and
sketching to creating a functional model. No matter your budget or experience
level, you can make a prototype that gets your idea off the ground.
Need Help with Patents or Trademarks?
MarketBlast® can refer you to top-tier, U.S. Registered
Patent Attorneys. Plus, you can submit
your patent directly to companies for royalty deals through our listed hunts.
What Is a Prototype?
A prototype is a working model or sample of your
invention. It can be a rough draft made from household materials, a 3D-printed
version, or a fully functional product ready for testing.
There are different types of prototypes,
including:
Concept Prototypes: Basic models that
show the design or structure.
Working Prototypes: Functional models
that demonstrate how the invention works.
Production-Ready Prototypes: High-quality
prototypes that look and function like the final product.
The type of prototype you make will depend on
your goals and budget. Now, let’s dive into how to make one.
Step 1: Start with a Sketch
The first step in making a prototype is to get
your idea on paper. Sketch your invention from different angles and include key
details.
Your sketch should answer questions like:
- How does the invention work?
- What parts are required?
- What materials might you use?
Don’t worry about artistic skill. The goal is to
visualize your idea and capture its key features. If you prefer a digital
approach, you can use tools like Canva, Sketchpad, or Adobe Illustrator.
Step 2: Create a Detailed Design
Once you have a basic sketch, take your design to
the next level by creating a more detailed technical drawing or 3D model.
Tools to Create a Detailed Design:
Tinkercad: A free, beginner-friendly 3D design tool.
Fusion 360: A professional 3D modeling software with
advanced features.
SketchUp: Great for creating technical drawings and 3D
models.
These designs will be useful when building your
prototype or working with a manufacturer.
Step 3: Choose the Right Type of Prototype for
Your Needs
Before you start building, decide what type of
prototype you need based on your goals.
Types of Prototypes:
Proof of Concept Prototype:
Purpose: Demonstrates the basic idea.
Materials: Cardboard, paper, clay, or other inexpensive
materials.
When to Use: Early stages, when you need to validate
your idea.
Functional Prototype:
Purpose: Shows how your invention works.
Materials: Wood, plastic, metal, or electronics (depending
on the product).
When to Use: To test functionality and fix design
flaws.
Production-Ready Prototype:
Purpose: Looks and functions like the final product.
Materials: High-quality materials used in the final
version.
When to Use: For presentations to investors,
partners, or manufacturers.
Choose the prototype type that fits your current
stage of development.
Step 4: Gather Materials and Tools
Now it’s time to gather the materials and tools
needed to make your prototype. Start with what you have on hand.
Common Materials for Prototypes:
- Cardboard or foam board
- Clay or modeling foam
- Wood or metal
- Plastic sheets
- 3D printed parts
- Electronics (if needed)
- Tools You May Need:
- Scissors or craft knives
- Glue gun
- 3D printer (optional)
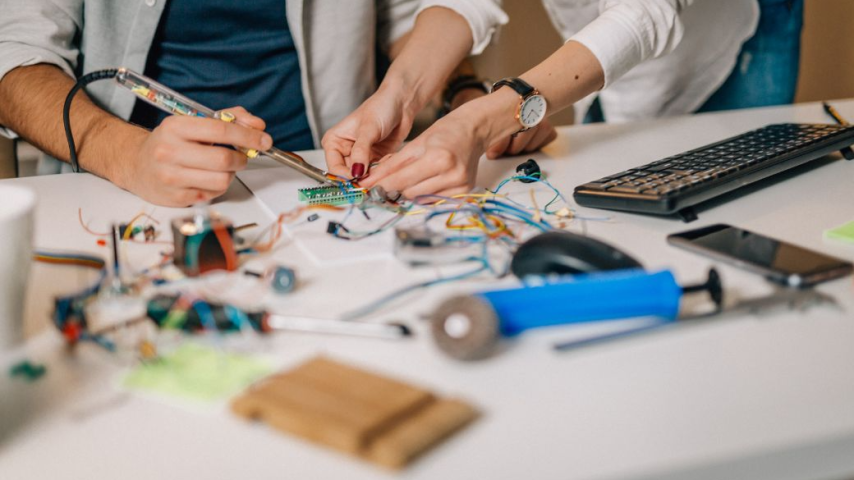
- Soldering iron (for electronics)
- Sandpaper and paint (for finishing touches)
If you need more advanced tools, consider
visiting a local makerspace or community workshop, where you can access
equipment like 3D printers and laser cutters.
Step 5: Build a DIY Prototype
If your invention is simple, you can build a DIY
prototype using household materials. For example:
- Use cardboard to create structural components.
- Mold clay to represent certain shapes.
- Use plastic sheets for transparent or flexible parts.
Tip: Don’t aim for perfection with your first
prototype. Focus on testing the basic functionality.
Step 6: Use 3D Printing for Precision
If your invention requires precise parts,
consider using 3D printing. 3D printers can produce accurate models with
intricate details.
How to Access 3D Printing:
Buy a Home 3D Printer: Consumer-grade 3D
printers start around $200.
Visit a Makerspace: Many makerspaces
offer affordable access to 3D printers.
Use Online Services: Upload your design
to services like Shapeways or Sculpteo and have them print and ship your
prototype.
3D printing is ideal for inventors working on
gadgets, tools, or products with unique parts.
Step 7: Partner with a Prototyping Company
For more complex inventions, you may need to work
with a prototyping company. These companies specialize in turning ideas into
professional prototypes.
Popular Prototyping Companies:
InventHelp: Offers prototyping, patent assistance,
and marketing help.
Protolabs: Provides rapid prototyping and low-volume
manufacturing.
Xometry: Specializes in on-demand manufacturing and
prototyping.
While this option can be more expensive, it can
save time and ensure a high-quality result.
Step 8: Test and Refine Your Prototype
Once your prototype is built, test it thoroughly.
Look for any flaws or areas that need improvement.
Questions to Ask During Testing:
- Does the prototype function as intended?
- Are there any design flaws?
- Can the materials be improved?
- Is the product easy to use?
Prototyping is an iterative process, so don’t be
discouraged if your first version isn’t perfect. Make improvements and create
new versions as needed.
Step 9: Protect Your Invention
Before showing your prototype to anyone, protect
your intellectual property (IP) to ensure your idea is safe.
Ways to Protect Your Invention:
Non-Disclosure Agreement (NDA): Have anyone who
views your prototype sign an NDA.
Provisional Patent Application: File a provisional
patent with the USPTO to secure "patent pending" status.
Taking these steps protects your invention from
being copied or stolen.
Step 10: Present Your Prototype to Investors or
Manufacturers
With a refined prototype in hand, you’re ready to
present your invention to investors, partners, or manufacturers. Here’s how to
make a strong impression:
Prepare a Pitch: Explain your
invention’s purpose, target market, and unique features.
Demonstrate Functionality: Show how your
prototype works.
Highlight Improvements: Share how you’ve
refined the design based on testing.
A well-made prototype can help you secure funding
or partnerships to take your invention to the next level.
Final Thoughts
Making a prototype of your invention is an
exciting and essential step in bringing your idea to life. Whether you start
with a simple DIY model or partner with a professional prototyping company, the
key is to take action, test your idea, and refine it until it’s ready for the
marketplace. With persistence and creativity, you can turn your invention into
a reality.
- Bring Your Idea to Life -
Get Your Free Product Design Info Today!
Founded with the vision to transform the landscape for
monetizing and commercializing innovative products and brands, MarketBlast® is
the leading Product Hunt and Submission Management Platform connecting buyers
and sellers across the globe. Since our inception, we have been dedicated to
empowering small companies, startups, entrepreneurs and emerging brands to
connect directly with industry companies and accelerate their own marketing and
sales efforts to achieve lasting results.
At MarketBlast®, we believe that innovation thrives
on collaboration. Our platform provides seamless access to a diverse network of
companies, proprietary content marketing and advertising programs, and access
to a wide range of resources designed to support the overall journey toward success.
For more information on signing up
for a premium membership or to start a content marketing campaign for your
products, email info@marketblast.com or visit MarketBlast®.
Other
Related Articles
Where to
Find Inventor Help Resources
How to Find
Invention Assistance Companies
